Auto-provisioning your Phone
V1.0
| 锚 | ||||
|---|---|---|---|---|
|
| 锚 | ||||
|---|---|---|---|---|
|
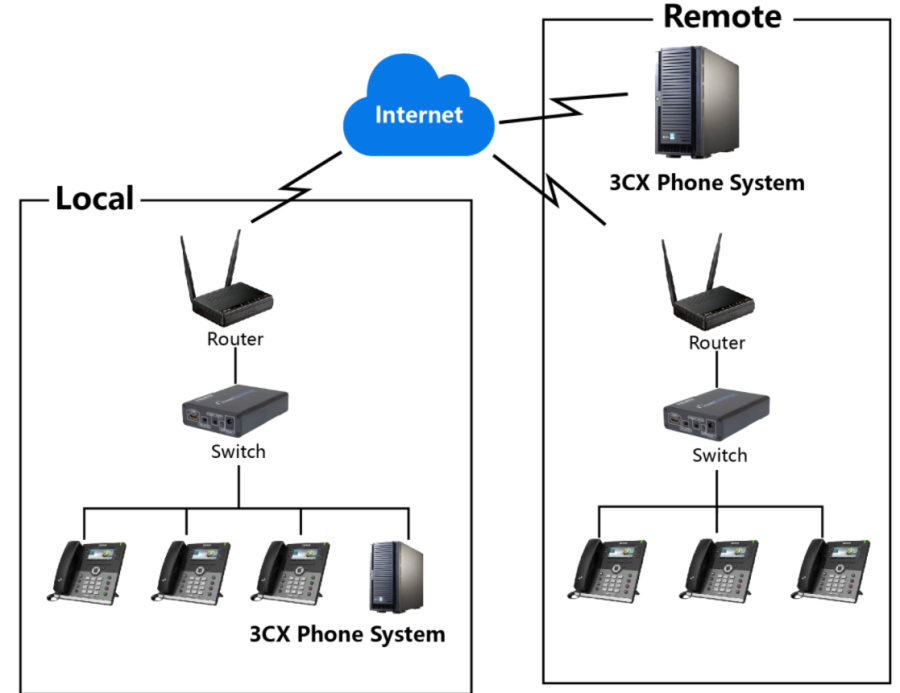
There are mainly two ways of provision with 3CX phone system: one is Provisioning via Plug and play (Local LAN), which is mainly used in the situation where Htek phone and 3CX phone system are in same subnet. And the other one is Provisioning via RPS (Remote), which is mainly used in the situation where Htek phone is remote from 3CX phone system. Please refer to the following picture:
This chapter provides the following instructions of auto-provisioning with 3CX phone system and show you how to edit the custom provision template on 3CX. Topics include:
| 锚 | ||||
|---|---|---|---|---|
|
| 锚 | ||||
|---|---|---|---|---|
|
If the 3CX Phone System runs on the default sip port 5060 and that the IP phones resides on the same local lan subnet as 3CX. Then, Provisioning via Plug and play is a good choice to provision your phones.

| 锚 | ||||
|---|---|---|---|---|
|
...
- Plug the phone into the network.
...
- The phone will send a multicast message across the LAN. This will be picked up by 3CX Phone System.
...
- The phone will show up in the "Phones" node in the 3CX Management Console as a new phone.

...
- Now assign it to an existing extension or create a new one.

...
- You will then be taken to the extension's provisioning tab where you can specify other configuration settings for the phone.

...
- Leave "Provisioning Method", Mac Address default
...
- Select "Phone Display Language" and "Timezone" for the phone.
...
- Click "OK".
...
- The phone will be sent a link to the configuration file with the settings you specified and configure itself.
...
- The phone will apply the settings and connect to 3CX Phone System. The IP phone will be manageable from within the 3CX Management Console.
| 锚 | ||||
|---|---|---|---|---|
|
| 锚 | ||||
|---|---|---|---|---|
|
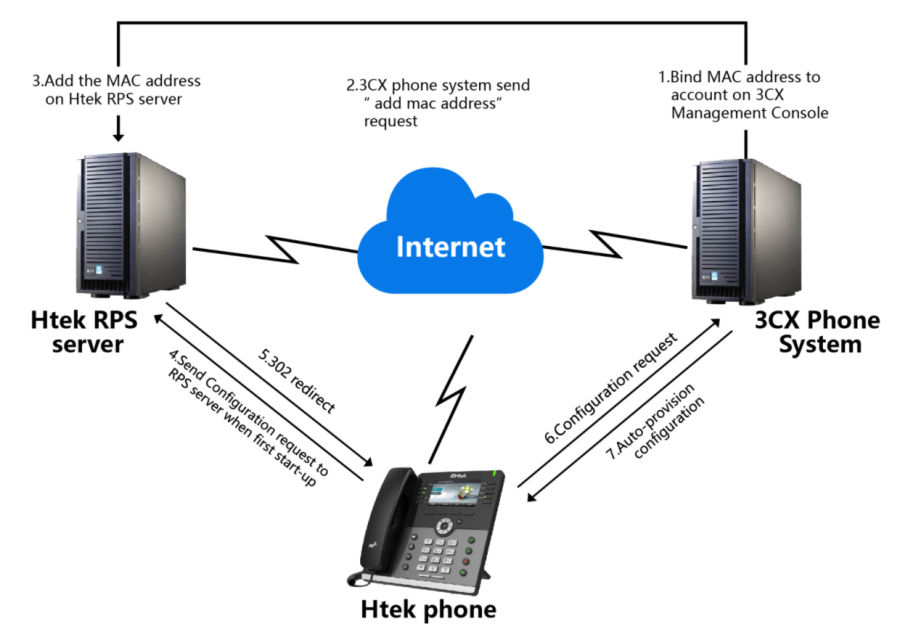
If your phones are not behind the same Local LAN with 3CX phone system. Then you can try to use Provisioning via PRS to provision your phones. Please refer the following picture.
| 锚 | ||||
|---|---|---|---|---|
|
...
- From the Phones node in the 3CX Management Console, select "Add Phone."

...
- Select the extension for which this phone is.
...
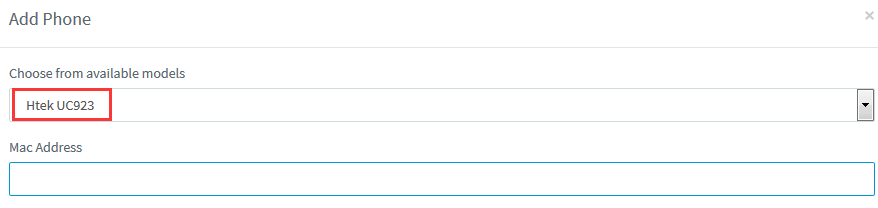
- Enter the MAC address of the phone (which can be found at the bottom of the phone).
...
- Select the appropriate phone model from the drop down menu.
...
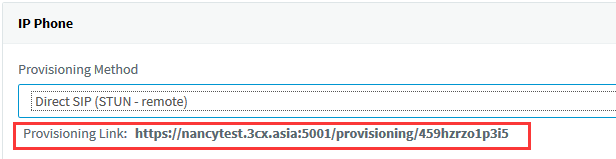
- In the "Provisioning Method" drop-down menu, select "Direct SIP (STUN - Remote)."
...
- Select "Phone Display Language" and "Timezone" for the phone.
...
- Click "OK." The provisioning files will now be created and the link published to the RPS server. You can check the server "Event Log" if the RPS was successfully sent
...

...
- Power on and connect the phone to the network within 14 days.
...
- The phone will boot up and request a username and password. Enter the corresponding extension number as username and voicemail pin for that extension as password - it should be provisioned automatically.
If you don't want to use RPS, you can insert the provisioning link manually into the phones. You can find it in extension configuration "Phone Provisioning" tab.
...
| 锚 | ||||
|---|---|---|---|---|
|
| 锚 | ||||
|---|---|---|---|---|
|
Maybe you are not satisfied with the default configuration of auto-provision. Each Htek phone setting provisioned by 3CX phone system is connect with a P number of Htek template file on 3CX phone system. We can modify the value of the p number in template so that to change the configuration which is provisioned by 3CX Phone system.
The following part "Operating Instructions" will show you how to modify the template by an example.
| 锚 | ||||
|---|---|---|---|---|
|
For example, we can refer to the following steps to change the default ringtone to ring 5.
Step 1, Find out which P number do you want to change and what value do you want to change to for the P number by the browser(e.g. firefox).
- 1, Login phone's webpage -> setting -> Preference -> ringtones

...
- Right click the drop-down box and chose the "Check the elements" item.
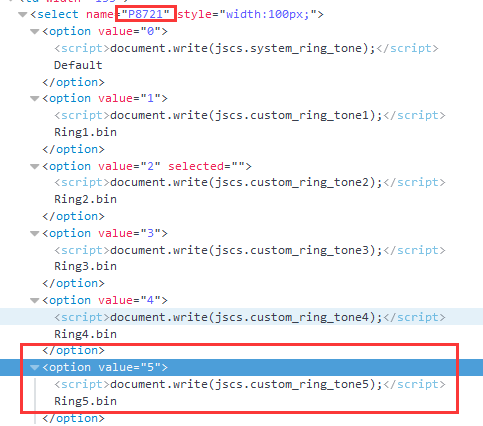
Now, I know the P number of setting ringtone is P8721, and the value 5 mean ring5.
Tips: You also can refer to our another document "parameters list"
Step 2, Find out the P number in the htektemplate and modify its value. 1,
- Find the folder that holds the Htek template, and open the template. You can refer to the following path.

...
- Open the template, and location the P1872 in the template by "Ctrl + F".
- And modify the value to what you want.

...
- If you can't find it in the template. You can add this item in the "Custom parameters" area.

Step 3, After modify the template successful, you just need torestart the 3CX phone system and the re-provision the phones.