Htek IP Phones Integrated with NetSapiens Platform Configuring Guide V1.0
目录
| 锚 | ||||
|---|---|---|---|---|
|
| 锚 | ||||
|---|---|---|---|---|
|
Thank you for choosing the Htek IP phones, which are exquisitely designed to provide basic phone features plus advanced business features, such as Forward, Transfer, Network conference, share line and Enhanced Monitor Extension over IP network.
The purpose of this guide is to serve as a basic guidance for auto-provision with the NetSapiens Platform.
- NetSapiens SNAPsolution v39 is the minimum system version needed for HTEK provisioning.
- Htek Provisionable Devices on NetSapiens platform including:
UC926U, UC926E, UC926, UC924W, UC924E, UC924, UC923U, UC923, UC912, UC903, UC902, UC46 sidecar. - HTEK firmwares no older than 2.0.4.4.46 are recommended.
- For support, please send requests to the Htek Ticket System (http://www.htek.com/TicketingSystem/), or send email to support@htek.com, or contact Htek FAE team on Skype (skype ID: hanlong.fae).
| 锚 | ||||
|---|---|---|---|---|
|
| 锚 | ||||
|---|---|---|---|---|
|
Topics provided in this guide include:
...
| 锚 | ||||
|---|---|---|---|---|
|
| 锚 | ||||
|---|---|---|---|---|
|
- V1.0 (2018-06-19): Provide a basic guidance for auto-provision Htek IP phones with NetSapiens platform.
...
| 锚 | ||||
|---|---|---|---|---|
|
| 锚 | ||||
|---|---|---|---|---|
|
This chapter will show you the basic process of phone's start-up and instructions of the way to get the basic information of the phone. Topics include:
...
| 锚 | ||||
|---|---|---|---|---|
|
| 锚 | ||||
|---|---|---|---|---|
|
After your phone is powered on, the phone will boots up, complete the initialization and check firmware. Please refer to the three phases of the LCD display:


In the process of initializing, the phone will attempts to contact a DHCP server in your network to obtain valid IPv4 network settings (e.g., IP address, subnet mask, default gateway address and DNS address) by default.
...
| 锚 | ||||
|---|---|---|---|---|
|
| 锚 | ||||
|---|---|---|---|---|
|
After the phone comes up, you can view phone status on phone user interface (LCD) via the following ways:
...
| 锚 | ||||
|---|---|---|---|---|
|
| 锚 | ||||
|---|---|---|---|---|
|
| 锚 | ||||
|---|---|---|---|---|
|
Phone model mapping on Netsapiens
| Configuration Template on Netsapiens | Corresponding Phone Model |
|---|---|
| Htek UC902 | Htek UC902 |
| Htek UC903 | Htek UC903 |
| Htek UC912P | Htek UC912P |
| Htek UC923 | Htek UC923 |
| Htek UC923U | |
| Htek UC924 | Htek UC924 |
| Htek UC924E | Htek UC924E |
| Htek UC924W | |
| Htek 926 | Htek UC926 |
| Htek UC926E | Htek UC926E |
| Htek UC926U |
Auto Provision via RPS
Provision the IP Phone via RPS is a convenience way.
In this way, you need create a server on RPS that mapping to the provisioning URL of Netsapiens (like http://<Endpoints-FQDN>alphandp.NetSapiens.com/cfg/).
And then you need bind the MAC address of the phone with your server on RPS first. (If you don't have a RPS account, please contact your sales or your provider)
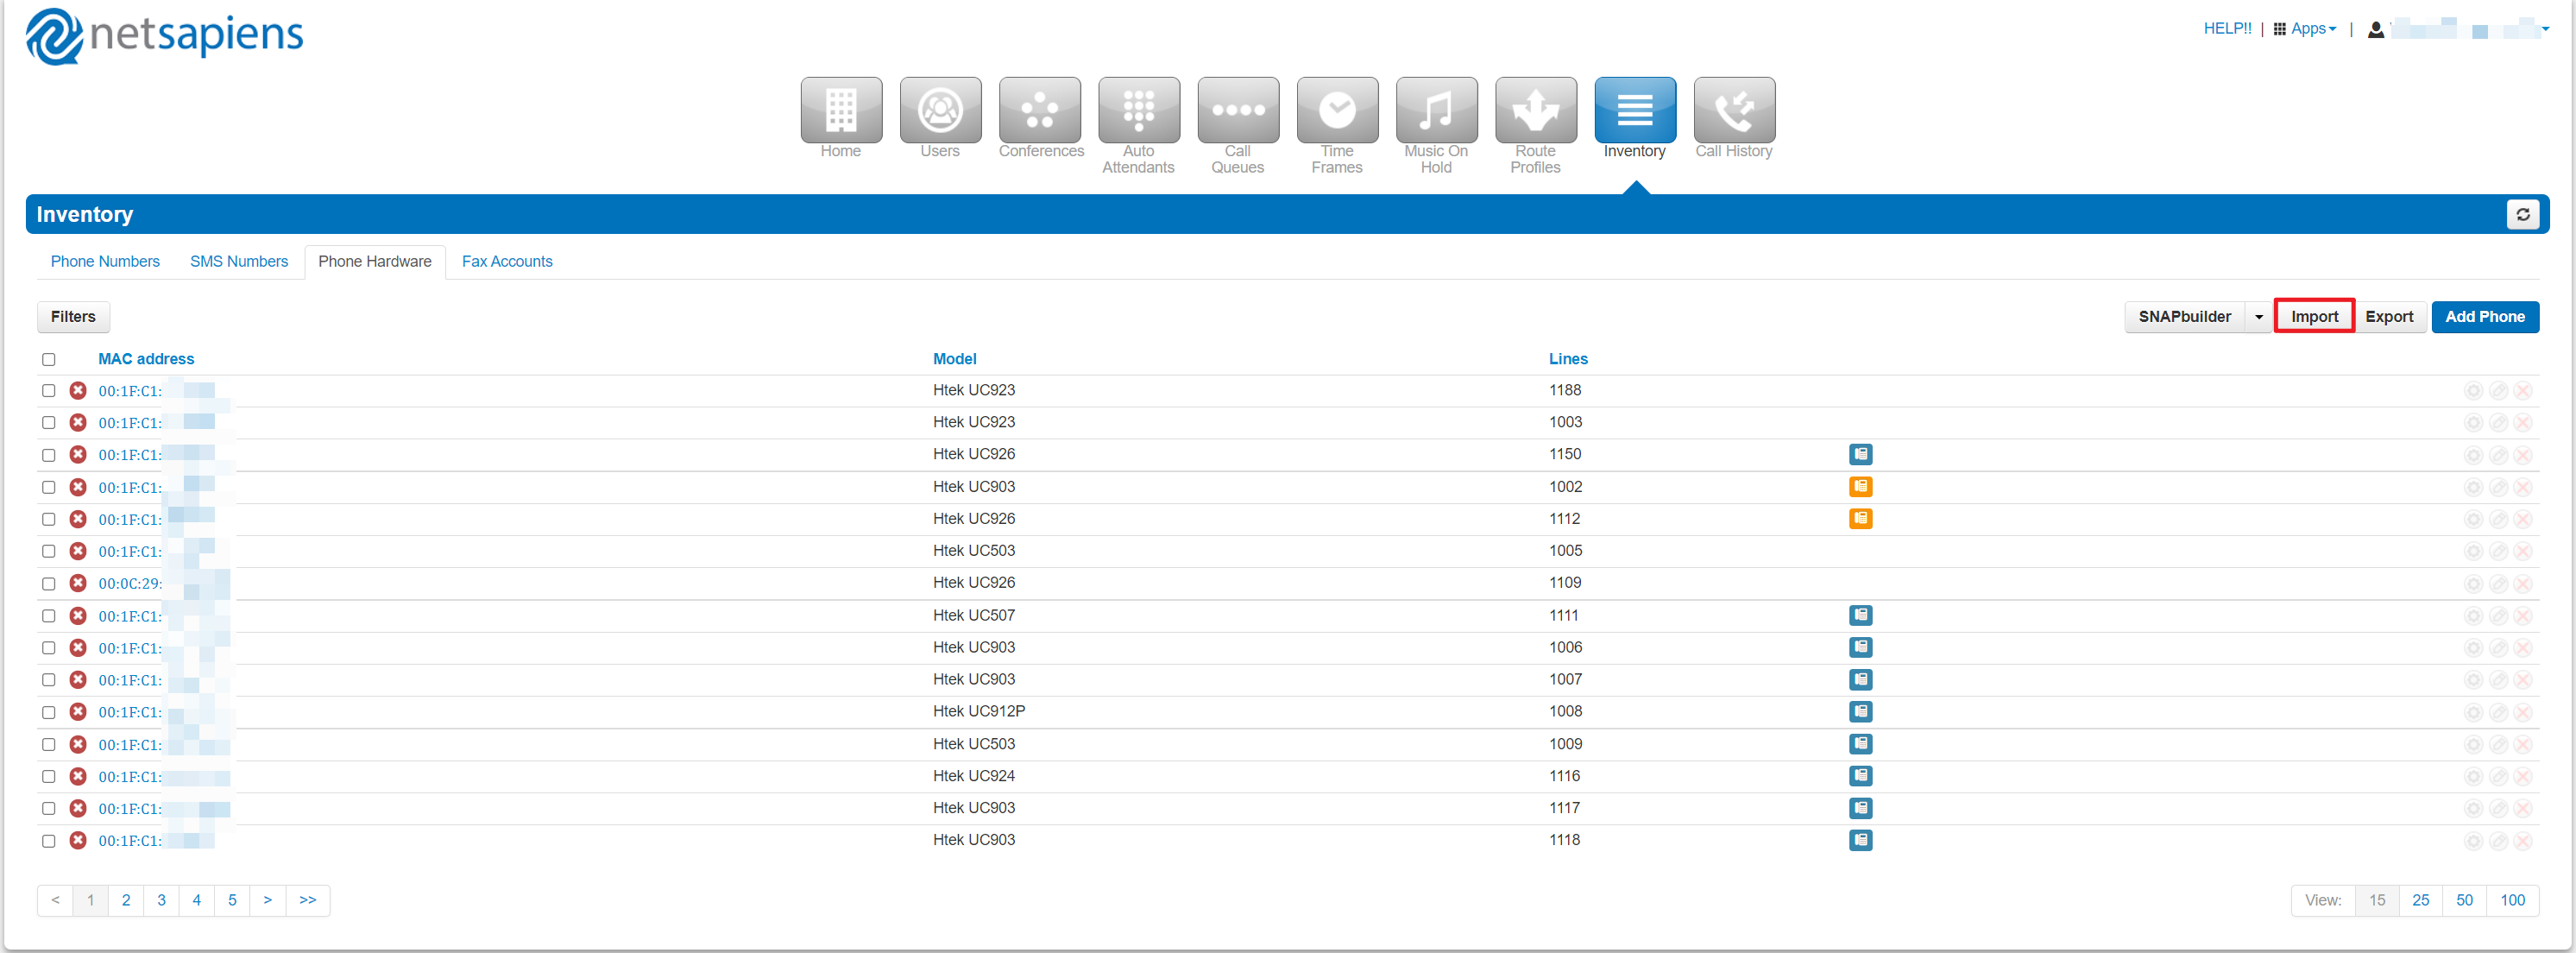
The last thing is add the phone to Netsapiens. You could add it one by one, but you also could add the phones by Import feature.
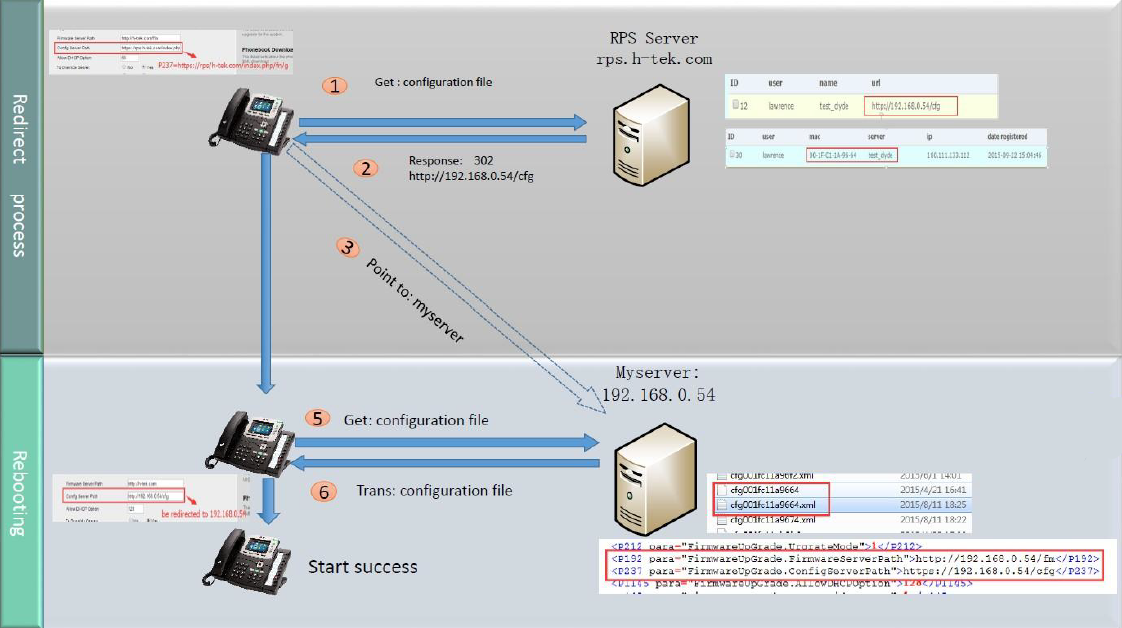
After that, when the IP Phone start up , default it will send 'Get' message to the RPS server, if the phone's MAC address is assigned on the RPS Server previously, the RPS server will send the preset URL of the configure server to IP Phone.
The work process of RPS show below. And more information about how to use RPS, please refer to these documents fm.htek.com/rs/rps.zip .
Auto Provision via DHCP Option 66
The most important way of Auto provision is DHCP option 66, which is mainly used in the situation where Htek IP Phone and NetSapiens platform can communicate with each other.
...
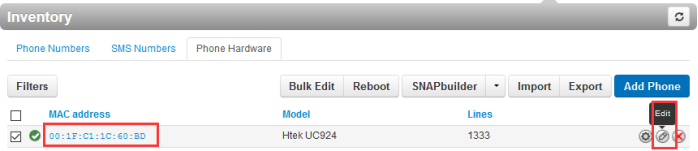
1.From the Phone Hardware tab,Click a MAC address or Hover over a phone, and then click the icon at the far right of the Phone Numbers tab. For example:
How to Filter, Import and Export Phone
The Phone Hardware tab also allows you to filter, export information about the phone hardware in NetSapiens platform.
...
Using the new configuration template for Htek IP Phones
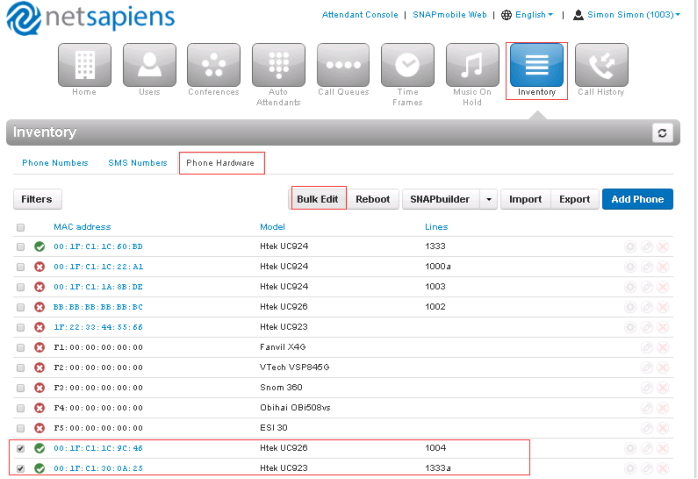
1.Click “Inventory”→“Phone Hardware→Select Inventory → Phone Hardware →Select a or more phones which you have added→ click “Apply a configuration template to selected Devices” from the “SNAPBuilder” drop-down arrow :
...
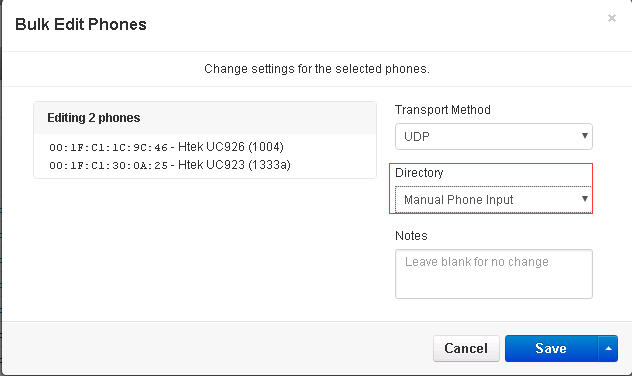
1.Click “Inventory”→ “Phone Hardware”→Select Hardware”→ Select a or more phones which you have added→ click the “Edit” button or “Bulk Edit” button:
2.Enable Diretory Directory for the selected phones:
...
- Press Menu Settings →Advanced →Settings →Reset
The password of Advanced is provisioned by NetSapiens platform. - Press the Enter softkey or OK key
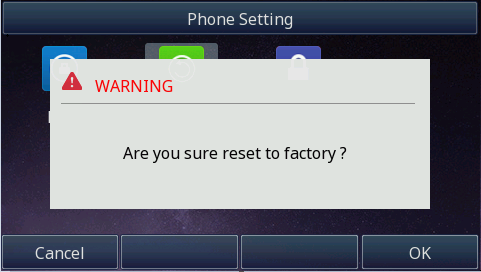
- Press OK softkey.
Note: Reset of your phone may take a few minutes. Do not power off until the phone has started up successful.The phone will be reset to factory settings successfully after startup.
...
| 锚 | ||||
|---|---|---|---|---|
|
| 锚 | ||||
|---|---|---|---|---|
|
This chapter provides general troubleshooting information to help you solve the problems you might encounter when using your phone. If you require additional information or assistance with your new phone, contact your system administrator.
Why is the LCD screen blank?
...