Buttons Feature On Vodia Platform
- Former user (Deleted)
Owned by Former user (Deleted)
Last updated: Oct 15, 2018
Buttons
Setting up buttons on the phones is a very useful feature of the Vodia PBX. It makes it very easy and intuitive to set up buttons on the phones that it serves.
On the Vodia PBX you can set up button profiles which you can assign to different extensions.
You can also modify a button profile to customize it for a particular extension.
Creating a Button Profile
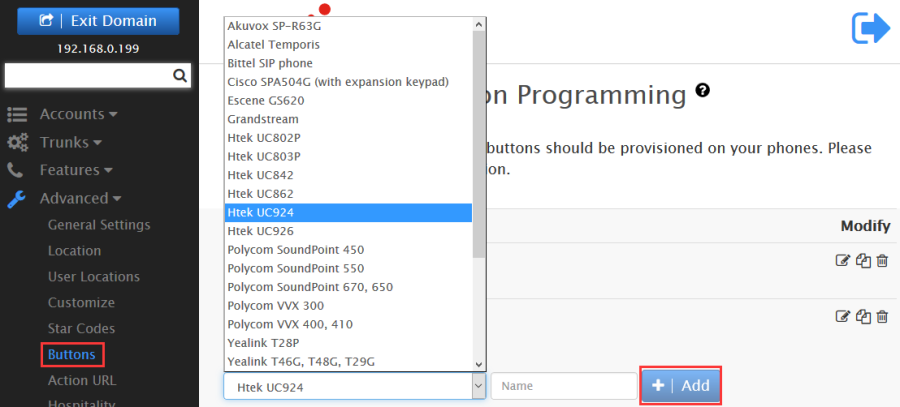
- Go to your selected domain in Vodia PBX web interface.
- Go to Buttons page.

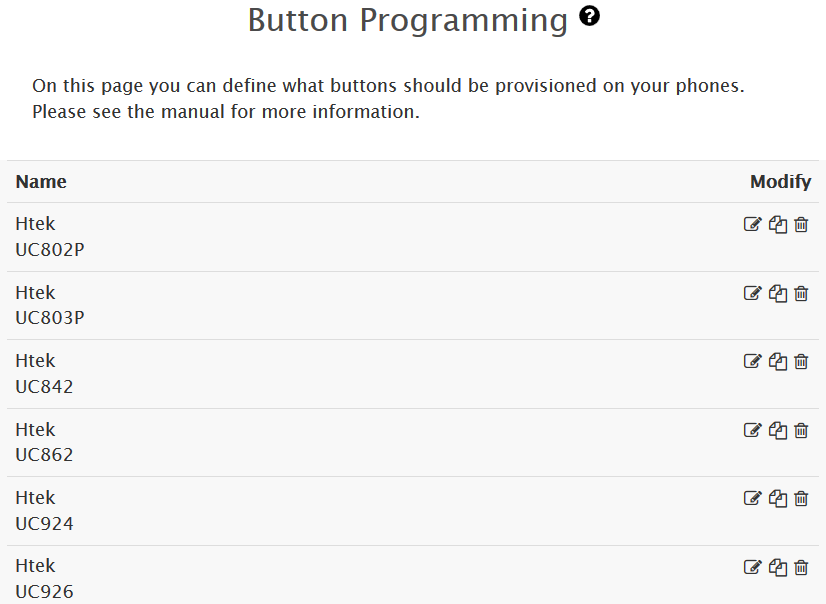
- On the buttons profiles page, just provide a name for the profile and press Create. The new profile will appear in the list, which you can then edit to add and map buttons.
Add and Map Buttons
- Once you have created a profile, you can edit it to add or modify buttons for that profile.
- Choose a number for the button. This number determines which button on the phone will be mapped to this button and got these settings. It may be different for different phones and models. More details on button numbers are given below.
- Choose the button Type which is a drop down list from which to choose. Button types are explained below.
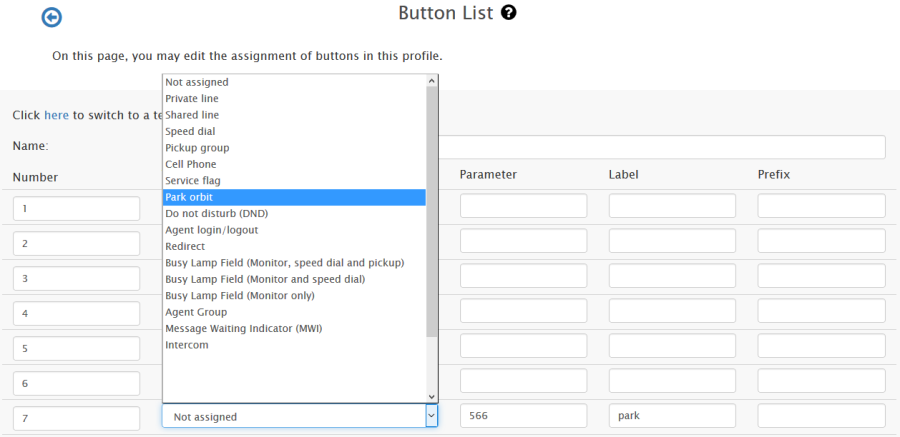
- Enter a value in the parameter field. This value will generally consist of an account on the system or an extension.
- Note Label is used only where phones use a display in front of their keys for labels or virtual keys.
Assigning Button Profile to an Extension
- Go to your selected domain in the PBX web interface.
- Go to the extension to which you want to assign a particular button profile.
- Go to the Buttons tab of the extension found at the top.
- In the Choose Profile dropdown, select the profile you want to assign to that extension, which can be any of the phone defaults or any other profile you might have created. You can also clone one of the existing button list and edit that to make your own list.
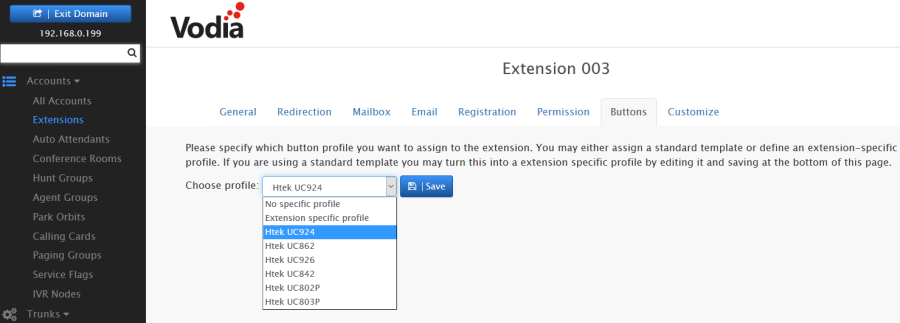
- Press Save
- Furthermore, you can make changes to that chosen profile as it appears below on that page, in order to customize it for that extension.
, multiple selections available,