Auto Attendants Feature On Vodia Platform
- Former user (Deleted)
Auto Attendants
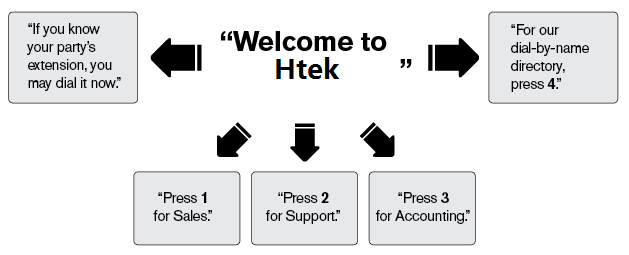
The auto attendant functions like a virtual receptionist, connecting incoming calls to extensions and other devices that have been configured to the system. The auto attendant often announces a company's name, followed by a selection of dialing options.
A typical welcome message might be "Thank you for calling Htek," for Sales, press 1," "for Accounts, press 2," and "for the dial-by-name directory, press 4." Callers press the number that corresponds with their selection and are directed accordingly.
Creating an Auto Attendant
- Go to your selected domain in the Vodia PBX web interface.
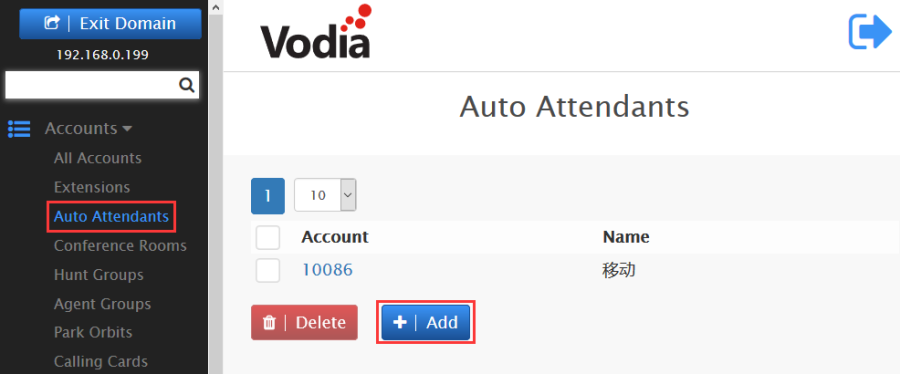
- Go to auto attendants by clicking on Auto Attendants under Accounts as shown above.
- On top, click the tab Create to create a new auto attendant.
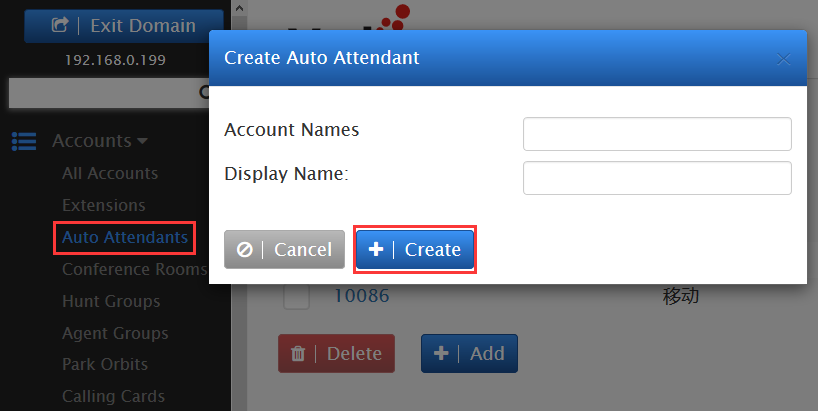
- In the Account Name field, enter an extension number. Note: If you use a space instead of a slash (667 9781234567), you will create two separate accounts that will be unrelated to each other.
- To create multiple accounts at the same time, use a space between the numbers: 567 568 569
- Press Create
- The auto attendant(s) will be created which you can see in the "auto attendant list" or in "all accounts list", where you can enter each auto attendant just by clicking it, in order to modify it if you want.
Configuring an Auto Attendant
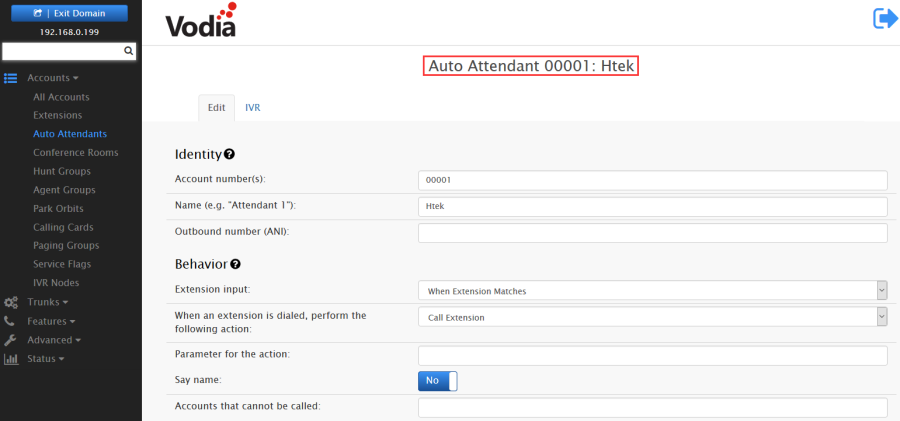
Once you've created an auto attendant account, use the following information to configure your settings.
- Go to your selected domain in the Vodia PBX web interface.
- Go to Auto Attendants.
- Click on any auto attendant from the list that you want to change.
- Here you can configure the settings. You can also go back to the list of Auto Attendants, if you want, by clicking on the List tab above.
Here we just introduce "Direct Destinations".
- Direct Destinations
The Direct Destinations feature is somewhat like a built-in version of the IVR system. To direct inbound calls to specified extensions, you can use the pre-configured destination fields and link them to pre-recorded announcements and user input options. Using the sample shown below, the auto attendant's welcome message will be as follows: "For Sales, press 1. For Support, press 2. For Accounting, press 3. For all other inquiries, press 0." (The user input options are linked to extensions 001, 002, 003, and 004.)

When configuring straightforward, uncomplicated auto attendants, direct destinations are a great solution.
Once the direct destination links have been established, the system will call the destination number whenever a caller enters the number that is associated with it.
In the sample shown above, when the caller presses 1, the call will be connected to extension 001.