Auto Attendants Feature On NetSapiens Platform
- Former user (Deleted)
Auto Attendants
Over View
How to Config
To add auto attendants
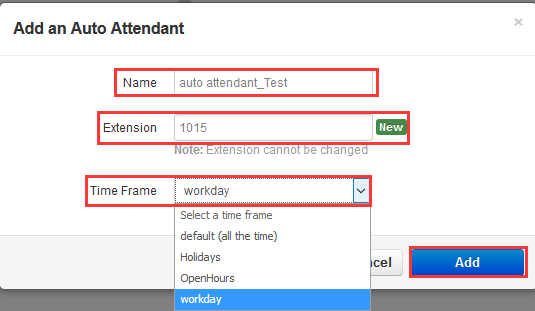
1.From the Auto Attendants page, click the Add Attendant button. The Add an Auto Attendant pop-up window appears.

Name:Enter a name for this auto attendant. The name should allow you to differentiate this auto attendant from other auto attendants you configured.
Extension:Adding an auto attendant: select the extension used with this auto attendant.Editing an auto attendant: read-only field that shows the extension.
Time Frame:Select a time frame to which this answering rule will be applied. Choices shown are the ones previously configured using the procedure under “Adding Time Frames”.
2.Enter the information:
3.You will see the the following interface:
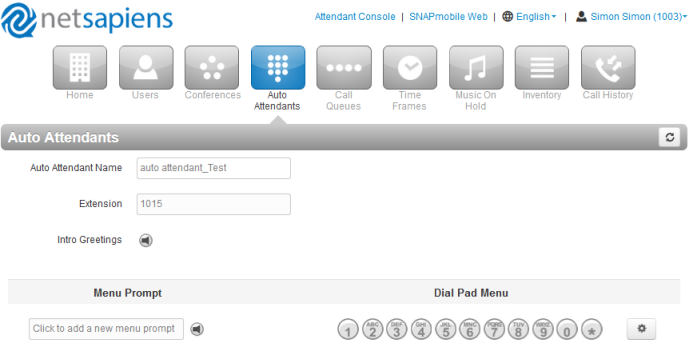
Auto Attendant Name:This is the auto attendant name you entered on the previous page. Use this field to change the name if desired.
Extension:Read-only field that shows the extension associated with this auto attendant that you entered on the previous page
Intro Greetings:Click the icon to display the Manage Greetings pop-up window and play, upload, record, or delete greetings.
Menu Prompt:Click in the text box or click the icon to upload or record a menu prompt.
Dial Pad Menu:Routes calls to one of a variety of resources when a caller selects that option. Click a number, and then select an application from the following pop-up:
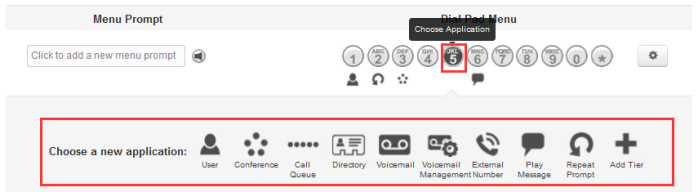
- User = goes to a user (extension).
- Conference = goes to a conference bridge.
- Call Queue = goes to a call queue.
- Directory = goes to a dial by name directory.
- Voicemail = goes to a specific mailbox.
- Voicemail Management = allows outside staff to call in and retrieve voicemail.
- External Number = forwards to an external telephone number (for example, to send caller to on-call staff).
- Play Message = commonly used for hours and directions.
- Repeat Prompt = replays the menu of options to the caller.
- Add Tier = adds a submenu with a new greeting and set of options.
4.Click the save button.
5.Edit the menu prompt by clicking the options button.
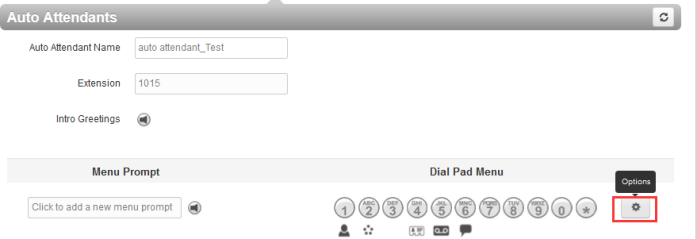
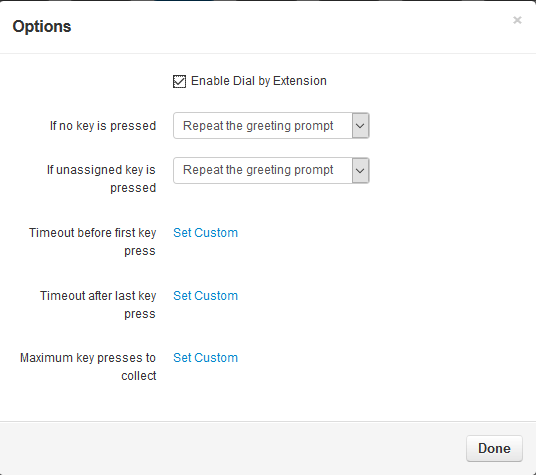
- Enable dial by extension = enable (check) or disable (uncheck) dial by extension.
- If no key is pressed = sets the default action if no key is pressed.
- If unassigned key is pressed = sets the action if an unassigned key is pressed.
6.Click Done when finished.
How to Use
1.Dial 1015
2.Netsapiens platform will play the intro greeting which have uploaded or recorded for the Auto Attendant.
3.Then enter the corresponding pad menu according to the Menu option prompt which have uploaded or recorded .