Auto Provisioning on Yeastar
- Former user (Deleted)
Provisioning via Plug and play (Local LAN)
Over View
If the Yeastar Phone System runs on the default sip port 5060 and that the IP phones resides on the same local LAN subnet as Yeastar. Then, Provisioning via Plug and play is a good choice to provision your phones.
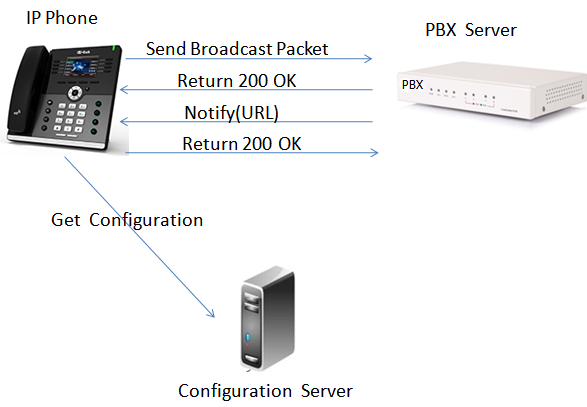 1. After saving the configuration and rebooting the phone in the "Auto-provisioning", the sip server sends notify message with reboot event. The phone receives it and replies 200 OK.
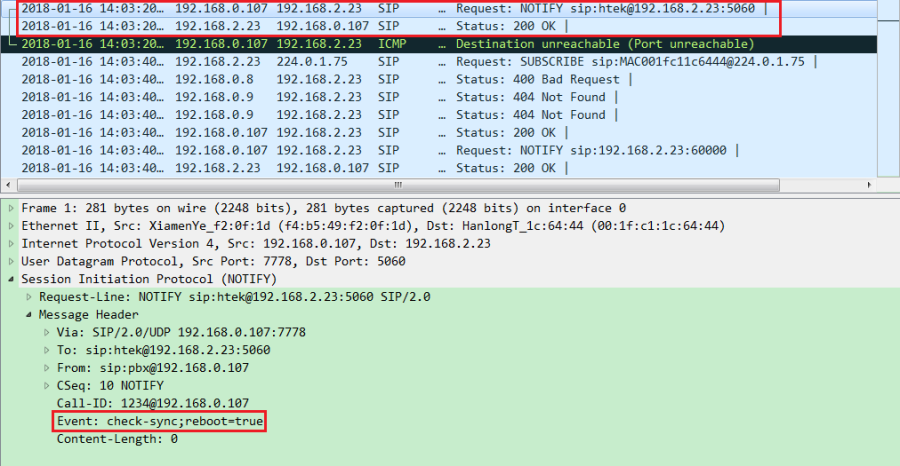 2. Then the phone will send multicast package to network equipment with its MAC address. The sip server receives it and replies 200 OK.
 3. Sip server sends notify message with its URL.
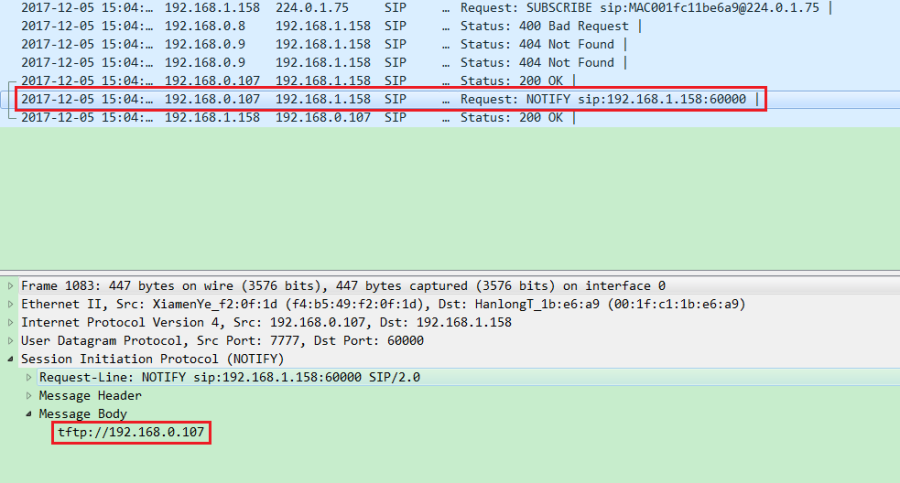 4. The phone replies 200 OK.
5. The phone will get the config files from the URL that notify message contains in the following order:
factory00xx.bin→cfg00xx.xml→cfgxxx (xxx is phone's MAC address)→cfgxxx.xml(xxx is phone's MAC address)→fwxxx.rom(xxx is phone's model)→phonebook/htek.xml
Preconditions
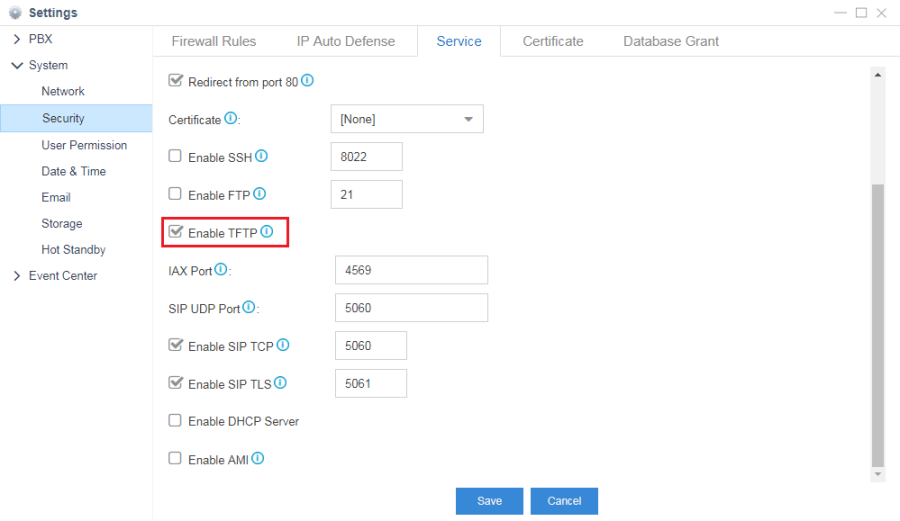
1. Yeastar S100: Settings→System→Security→Service→Enable TFTP.
 2. Enter the webserver of the phone: Management→Auto Provision→Firmware Upgrade→PnP Active: Yes(default).

Operating Instructions
1. Plug the phone into the network.
2. The phone will send a multicast message across the LAN. This will be picked up by Yeastar Phone System.
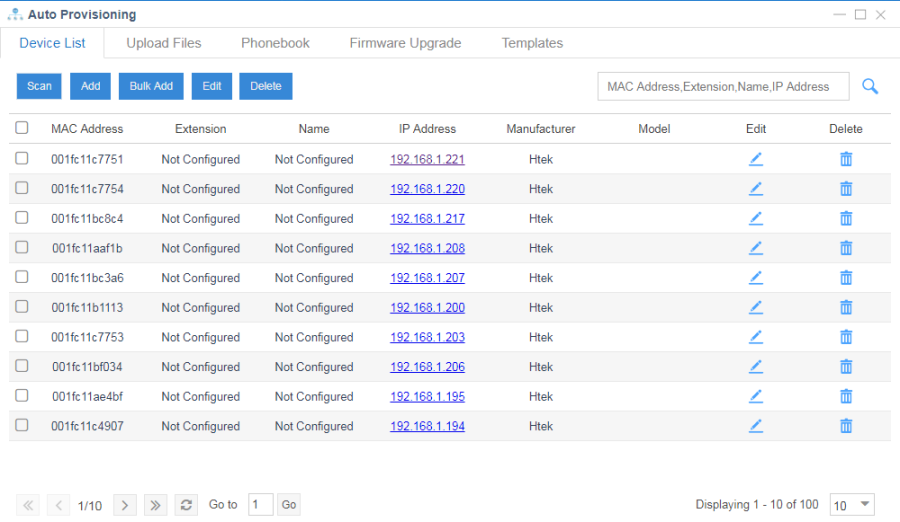
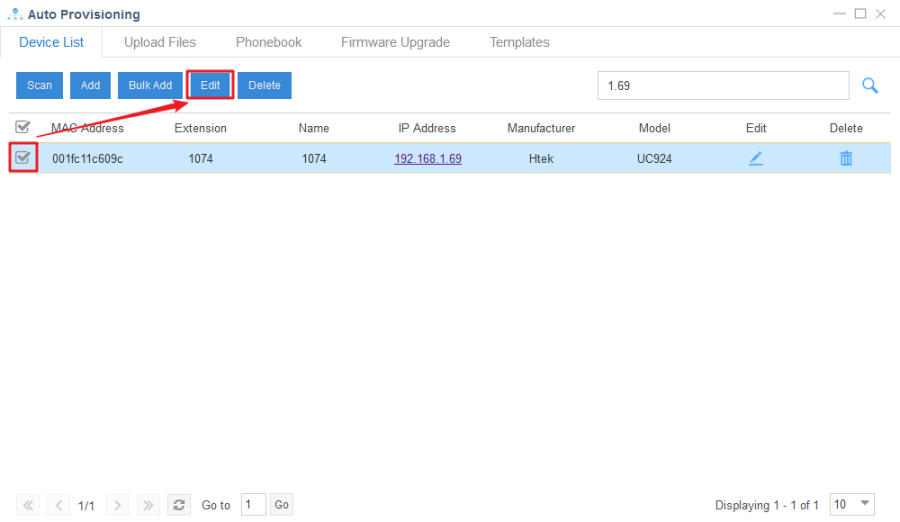
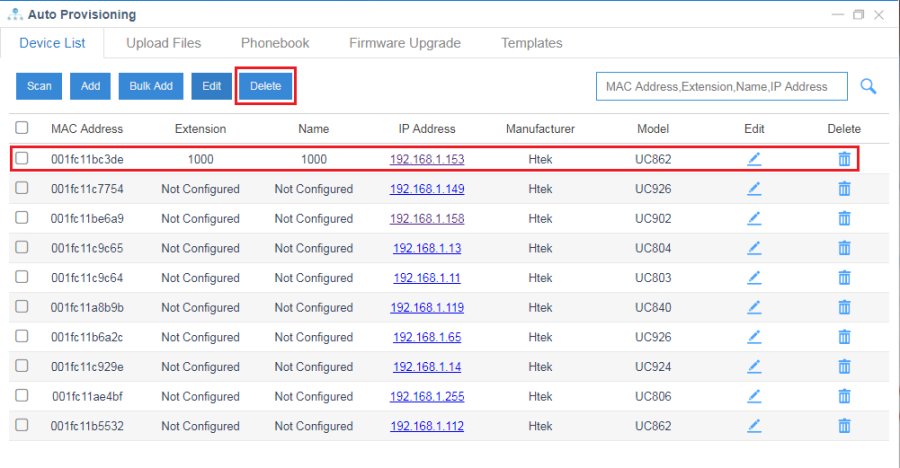
3. Enter "Auto-provisioning", and then click "Scan", the phone will show up in the "Device List".
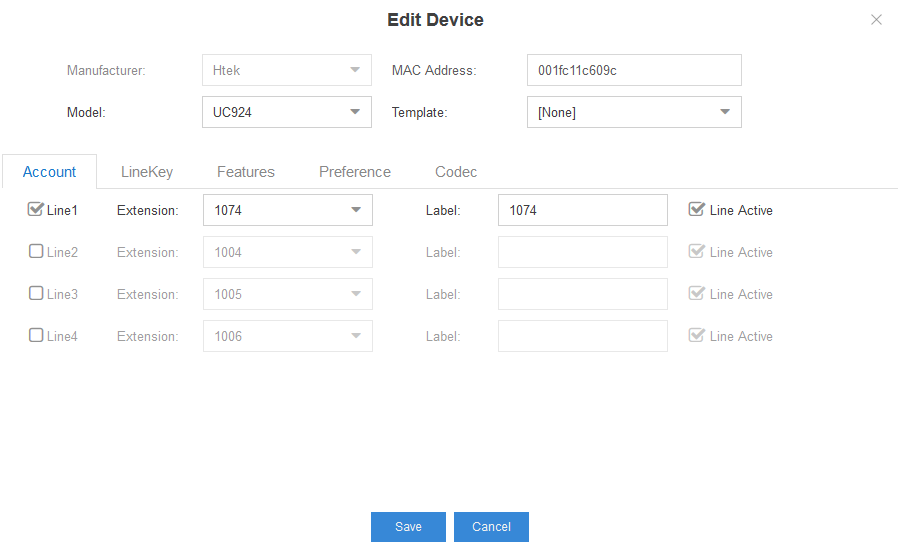
 4. Click "Add", and you can add a phone.
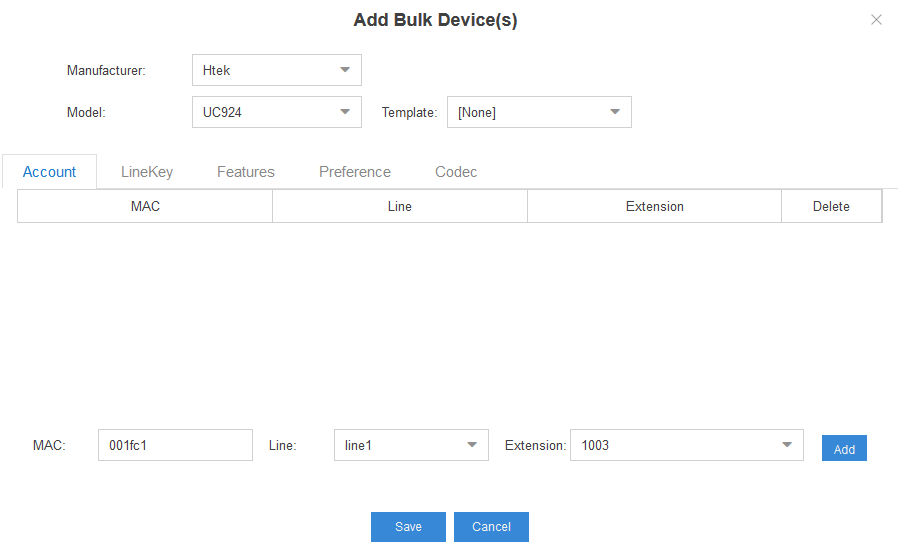
 5. Click "Bulk Add", and you can add phones of the same model.
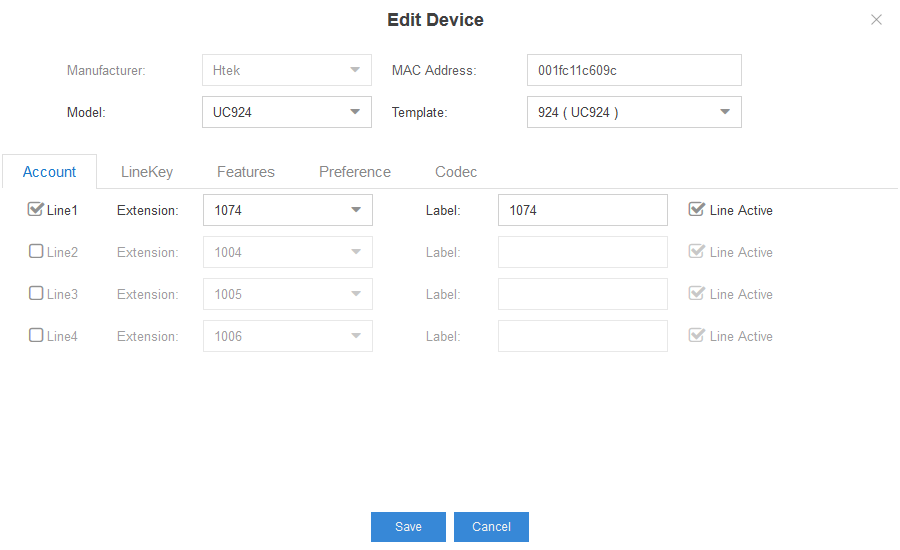
 6. Click "Edit" or
 ![]() , and assign an extension to it in the Account page.
, and assign an extension to it in the Account page.
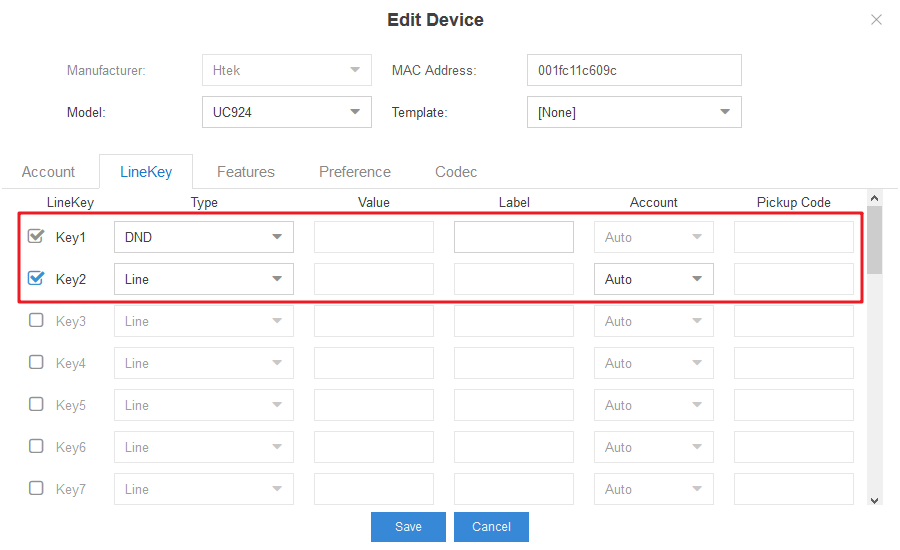
 7. Configure LineKey. You can edit Type, Value, Label and Pickup Code of a key. LineKey has 35 types: Line, SpeedDial, BLF, BLF List, Voicemail, Direct Pickup, Group Pickup, Call Park, Intercom, DTMF, Prefix, Local Group, XML Group, XML Browser, LDAP, BroadSoft Group, Conference, Forward, Transfer, Hold, DND, Redial, Call Return, SMS, Record, URL Record, Paging, Group Listening, Public Hold, Private Hold, Shine Line, Hot Desking, ACD, Zero Touch, MultiCast Paging.
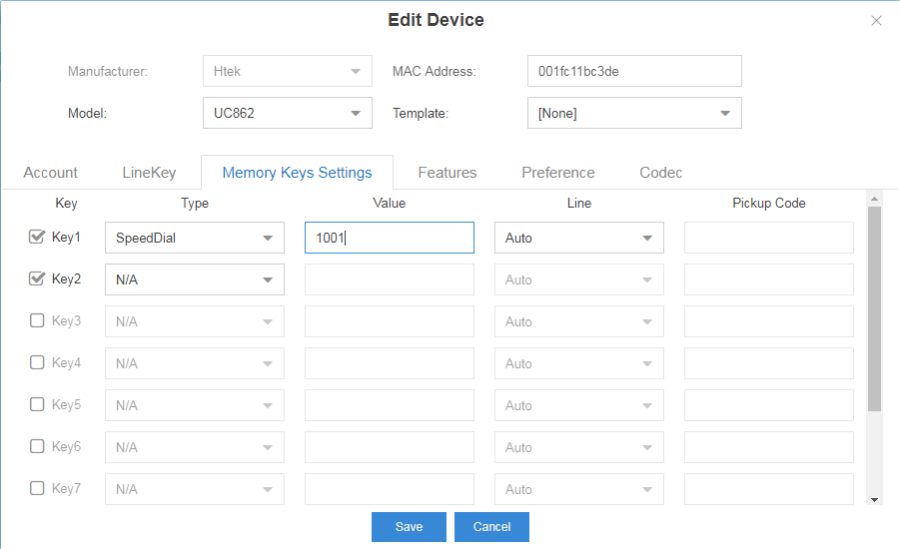
 8. Configure Memory Keys Settings. You can edit Type, Value, Line and Pickup Code of a key. Memory Key has 35 types: Line, SpeedDial, BLF, BLF List, Voicemail, Direct Pickup, Group Pickup, Call Park, Intercom, DTMF, Prefix, Local Group, XML Group, XML Browser, LDAP, BroadSoft Group, Conference, Forward, Transfer, Hold, DND, Redial, Call Return, SMS, Record, URL Record, Paging, Group Listening, Public Hold, Private Hold, Shine Line, Hot Desking, ACD, Zero Touch, MultiCast Paging.
Tip: The Memory Keys Settings option is only for UC802, UC802T, UC803, UC803T, UC806, UC806T, UC806G, UC860, UC862
 9. Configure Features. You can configure Call Waiting, Auto Redial, Auto Answer, Voicemail, AP Phonebook, Key As Send and Remote Phone Book in this page.
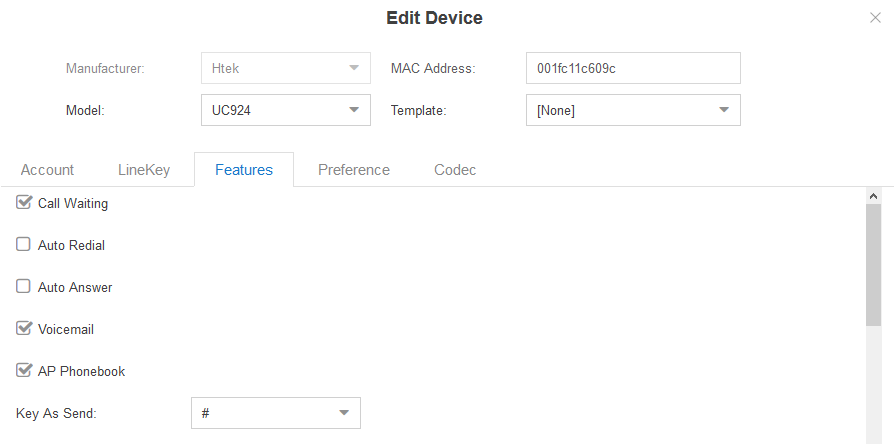
 You can enable call waiting, auto redial, auto answer, voicemail and AP phonebook.
Call waiting can let you receive other call when you are talking with someone.
Voicemail can let others leave message to you when your phone number is not available.
If "Key As Send" is selected "#", you can press "#" as send when you make a call.
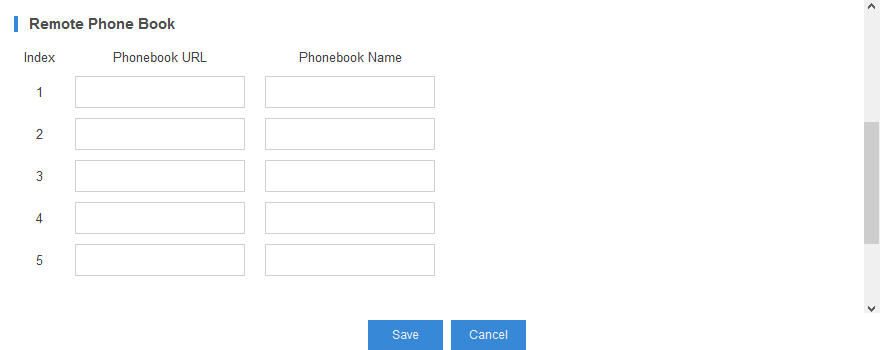
You can edit phonebook URL and phonebook name to configure Remote Phone Book.
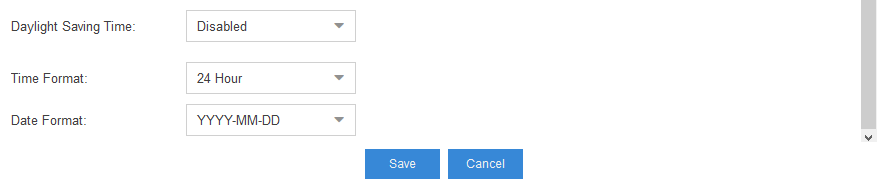
10. Configure Preference. You can set Webserver Type, Language, Admin Password, Time Zone, Primary NTP Server, Secondary NTP Server, Daylight Saving Time, Time Format and Date Format.
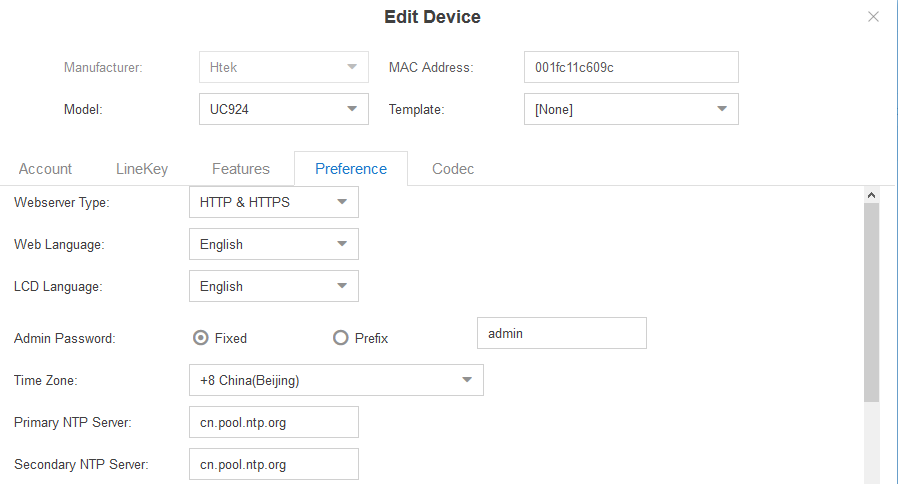
 Webserver Type is the type to access the web interface.
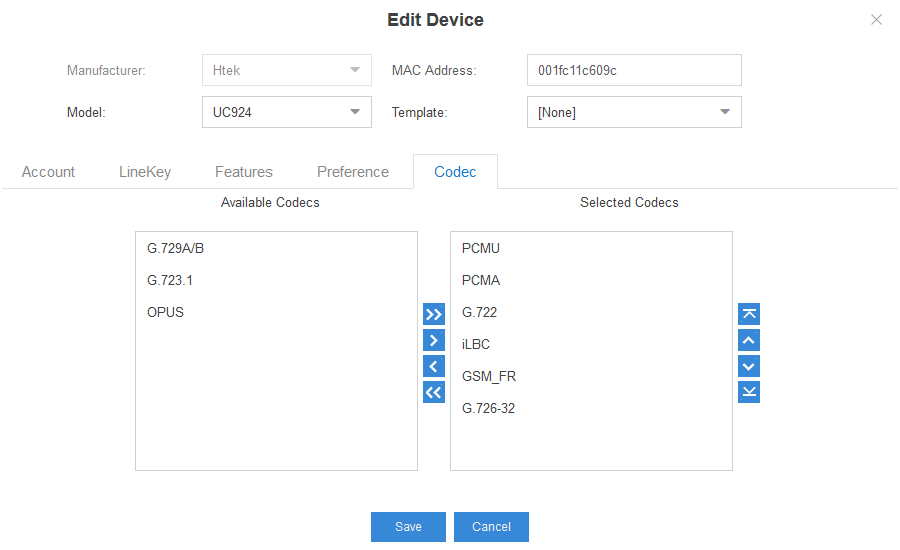
11. Configure Codec. Htek IP Phone supports PCMA, PCMU, G726-32, G722, iLBC, GSM_FR.
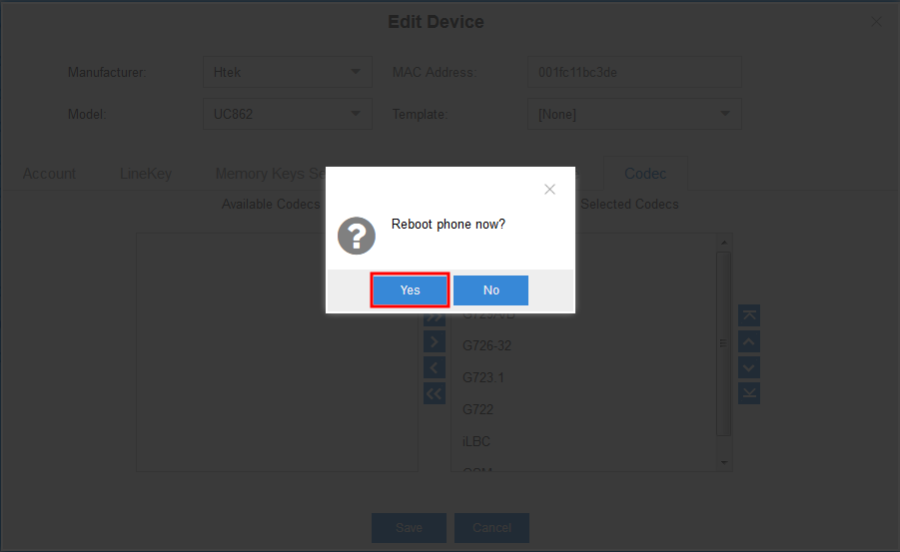
 12. Click "Save", "Reboot phone now?" will be shown. Click "Yes", the phone will restart.
 13. If the phone has PnP enabled, it will receive a link to a configuration file that records the settings you specify and configures itself.
14. The phone will apply the settings and connect to Yeastar Phone System. The IP phone will be manageable form within the Yeastar Auto Provisioning page.
15. Click "Delete" or ![]() , you can delete the configuration in the Yeastar Auto Provisioning page.
, you can delete the configuration in the Yeastar Auto Provisioning page.
Edit custom provision template
Over View
You can create a template in the Yeastar to choose when you assign an extension. The following part "Operating Instructions" will show you how to create a template by an example.
Operating Instructions
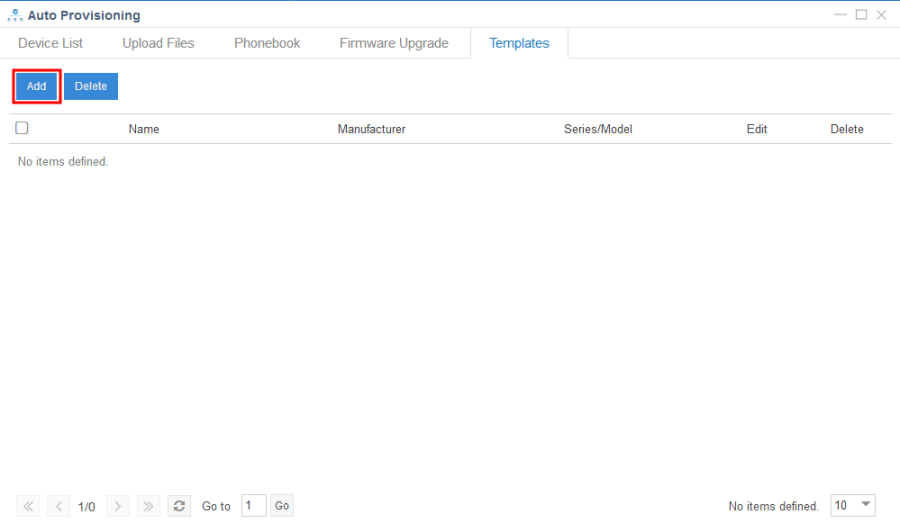
1. Auto Provisioning→Templates→Add. Fill in name and choose Manufacturer and model. Click "Save".
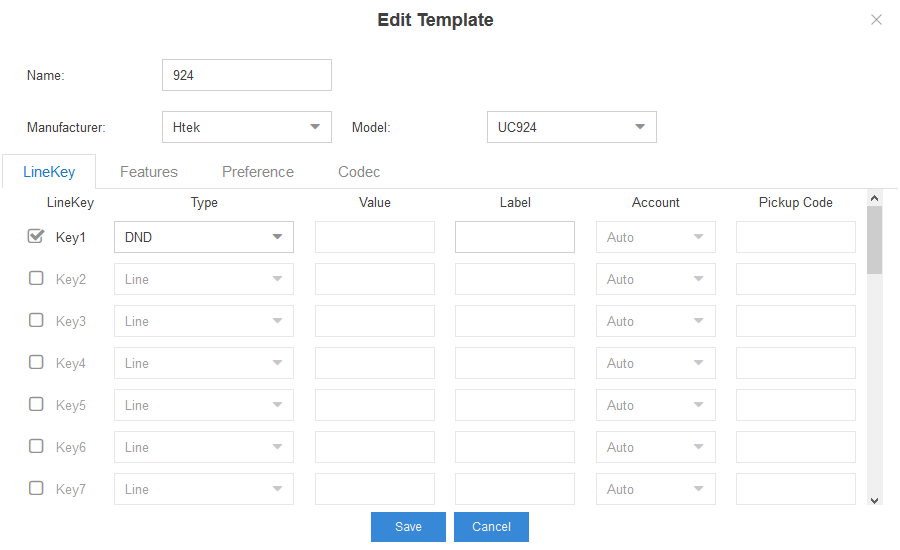 2. Click
 ![]() . Configure LineKey, Memory Keys Settings, Features, Preference and Codec. Click "Save".
. Configure LineKey, Memory Keys Settings, Features, Preference and Codec. Click "Save".
3. You can choose the template and add an extension when you add or edit Device.
 4. Click "Save" and the phone with PnP enabled will restart and apply the settings of the selected template.